Showing posts with label frugality. Show all posts

Friday, April 18, 2014

Homemade Yogurt and Blueberry Sauce

There has been a lot of activity in our kitchen lately! Some of it has to do with the recent remodeling projects. (That's another post for another day.) Some of it has been experimenting with a simple way to make yogurt.

"Why?" you ask.

Two reasons:

  1. We spend wa-a-a-a-ay too much money on yogurt at the grocery store. (The Bear and I can easily put away 3 cartons a day. Even with coupons and sales we spend at least $2.50 a day or $17.50 a week since he eats 2 cartons of Greek style and I eat at least 1 of whatever style we have available.
  2. Neither one of us needs the additional bovine growth hormone that I fear might be in some of the yogurt we consume. He is a man. I am a post-menopausal woman. Enough said. The only ways I know to avoid this hormone are to buy only organic - which would be wa-a-a-a-ay more expensive than what I'm spending now - and I don't want to spend a lot of money on yogurt (see #1 above); or make it myself using non-hormone injected cow's milk. Uh, I choose the latter option.
After a bit of experimentation I have come upon a nice method for making it using equipment and supplies I already had on hand, unless you count the cheese cloth that I bought because I was out of it. Oh, and 1 carton of organic plain yogurt as my starter. (Bought on sale and with a coupon.)


My equipment: a large dutch oven for heating the milk and a pressure cooker/canner for incubating a batch. Also, 2 quart-size mason jars with lids, a funnel, a wooden spoon, cheesecloth, and a candy thermometer.

Steps for making yogurt:

  • Pour 8 cups of milk into dutch oven. (That's 1/2 gallon of milk. No matter what price you pay for your milk this method will be a whole lot cheaper than buying 8 cups of yogurt!)
  • Heat your milk to 180 degrees while stirring constantly with a wooden spoon. Use a meat or candy thermometer for accurate measurement. My candy thermometer does a great job helping me make yogurt but it has never helped me make good candy! My holiday fudge always turns into a disaster. Or a nice fudge sauce. Depends on how you market your product. Which is why one of our family traditions includes celebrating Christmas with hot fudge sundaes. :)
  • After the milk has reached the desired temperature it needs to be taken off the burner and allowed to cool until it reaches 110 degrees. If you let it sit too long just put it back on the heat until it reaches the desired 110 degree temperature.
  • Stir 1/4 cup of cultured organic yogurt into your warm milk. I always use a wooden spoon when making ANYTHING that uses a starter (sourdough bread, friendship bread, etc.). It is probably an unnecessary precaution since the milk is heated in a stainless steel pan, but I do it anyway because somewhere in the back of my mind is the thought that metal kills live cultures. Not sure why that thought is there. Anyway. . .
  • Using a clean funnel, pour the warm cultured milk into 2 clean mason jars. Place lids on them. These lids can be reused for each batch because you will not be sealing them to the jars.


  • Place the jars on the rack in the pressure cooker/canner. As you can see, my canner holds 5 quarts but that would be a bit too much yogurt, even for The Bear and me. Actually, it would be a bit too much for my refrigerator. Now that I know how to make this quickly 2 quarts at a time is plenty.


  • Place water in the canner so that the level is about 1/2 way up the sides of the jars. Heat the water until it reaches 110 degrees. Then turn off the stove.
  • Once the proper temperature is reached, put the lid on the pressure cooker but DO NOT add the pressure gauge. The idea is to keep the cultured milk incubating, not cooking!
  • Open the pressure cooker every 2 or 3 hours to check on the temperature of the water. If it feels too cool turn the stove on "low" for a short time. DO NOT ALLOW THE WATER TEMPERATURE TO RISE TOO HIGH! If you do, it will kill your cultures. Ask me how I know.
  • Go to bed. Really. I start my yogurt about mid-afternoon and I check the water temperature two or three times, the last time being right before I retire for the night.
  • Wake up to 2 jars of fresh, creamy yogurt!
  • I always take out 1/4 cup of cultured yogurt and place it in a separate container in the refrigerator before I do anything else. This is the starter for the next batch.

Strain some of your yogurt using cheese cloth to make Greek style. The Bear likes the thicker curds of this style of yogurt. I'm not particular. 

Use the milky liquid, the whey, that results from the straining in place of buttermilk in pancake or biscuit recipes. It makes them light and fluffy!

Stir spoonfuls of homemade jam and jelly into your individual yogurt servings. I use strawberry jam, peach jam, and apple jelly. Since The Bear and I are partial to blueberry flavored yogurt I make blueberry sauce and keep it in the refrigerator near the yogurt. (Recipe below!)


Blueberry Sauce


This blueberry sauce is adapted from the Blueberry Pie Deluxe recipe found in The Backyard Homestead by Carleen Madigan. (The whole pie is excellent, too!)

Ingredients:
3/4 cup granulated sugar
3 Tablespoons cornstarch
1/8 teaspoon salt
2 cups fresh or thawed blueberries
1/4 cup water
1 Tablespoon butter
1 Tablespoon lemon juice

Directions:
Combine the sugar, cornstarch, and salt in a medium saucepan. Add the blueberries and water. Cook over medium heat, stirring constantly until the mixture boils, thickens, and clears. Remove from heat. Stir in the butter and the lemon juice. Cool. Then refrigerate.

Place about 2 Tablespoons of the filling on top of your regular or Greek homemade yogurt. Delicious!

Friday, March 29, 2013

Read Along With Me...And a Few Hundred Other Women

You might have noticed the button on my left sidebar for the Women's Bible Cafe (scroll down a bit). If you visit their website you might find an online Bible study group in which you wish to participate or links to help you in your walk with the Lord.

Now you will also find a link for a Book Club! The first month's selections have been posted and it isn't too late to participate. Actually, discussion does not even begin until May so you have time to obtain the books, take notes, and get ready for the website or Facebook discussion.

I've got my books and I'm ready to go!

And with keeping with that frugal gene that seems to be dominant in my DNA let me give you a few hints for getting the books inexpensively. I, for one, don't like to buy hard copies of a book unless I deem it a "keeper" that I must read again and mark up thoroughly. Even then, I might just highlight my Kindle copy excessively. :)

April Fiction 

This book is available for free at Paperbackswap (I just checked.)

It is available as a paperback for various prices at Amazon, depending on whether you want a new copy or not. They have it available as a Kindle book for $5.99.

It is available as an ebook at CBD for $5.99 and you can read it on your computer, Kindle Fire, iPod, etc.  They also have the paperback for $10.49, which is comparable to new at Amazon.


April Non-fiction 

This book is available in paperback at Amazon for various prices, again depending upon whether you desire a new copy. It is also available for the Kindle Fire and you can borrow it for F-R-E-E if you are a Prime member (which I am). Or you can buy it for your Kindle Fire for $8.54 if you wish. (There are also audiobook versions available.)

It is also available at CBD in paperback for $8.99 or ebook for $8.44. They also sell the DVD audiobook version.


As you can see, both books can be obtained for free if you would like to participate but you don't want to spend money or your library doesn't have a copy available for loan.

(**The pictures are courtesy of Amazon. I am NOT an Amazon affiliate and receive no compensation for encouraging the reading of these books.)

Thursday, March 21, 2013

Hungry? Try This Pancake Recipe

source
I know this isn't a cooking blog, but I have got to share with you this amazing recipe that I discovered yesterday for the most delicious pancakes I have EVER made (or eaten)! They were tasty, light, and fluffy. As a matter of fact they disappeared so fast that I didn't get a picture so I had to borrow one.

I have never been a fan of buttermilk. Meaning, I can't stand to drink the stuff! But I have become a huge fan of baking with it. My homemade biscuits and pancakes have been better than usual lately and it has got to  be the buttermilk! It isn't just the taste of the finished product. It's the consistency!

So here is the recipe I devised for our pancake supper last night:

Sift together in a large bowl (I used a large Pampered Chef Batter Bowl):

1 1/4 cup flour
1 Tablespoon sugar
1 Tablespoon baking powder
1/2 teaspoon salt

(I don't care if the flour says it is presifted. Sift it anyway! I sifted the dry ingredients together earlier in the day while the kids were down for their naps and did the following steps when we were ready to eat breakfast for our dinner.)

Add the following to the dry mixture:

Cut 2 Tablespoons shortening into the dry ingredients in the bowl with a pastry blender (again, mine came from Pampered Chef) until the mixture resembles crumbs.

Beat 1 egg in a separate cup. Then dump it into the flour-shortening mixture.

Add buttermilk. (Start with 1 cup and then add more 1/4 cup at a time until it reaches the consistency that you like for either thick or thin cakes. I used about 1 1/2 cups.)

Mix well with a wire whisk.

Fry on a lightly greased, hot griddle, turning when done around edges and bubbly in the middle.

****

The next time I make these I'm going to be sure that I have both real butter and maple syrup on hand! Why allow margarine and maple-flavored boiled sugar to cheapen the taste?

And if you need any Pampered Chef items feel free to contact my daughter, Elisabeth (aka Lisa), who is my own personal PC consultant.  :)

Thursday, February 21, 2013

Another Year of T-shirts for the Grandchildren

It has become a Rite of Spring for me, this making of t-shirts for our grandchildren. Lovingly fingering the thin cotton material while dressed in wool always lifts my spirits knowing that the weather will one day be warm enough for the children to wear them.
 
This year I decided to design my own t-shirts instead of buying already designed iron-on transfers at the craft store. That way each child will have something that fits his or her personality and interests, or at least that is the goal.  :)
 
 
 T-shirt #1
 
I only have 2 completed so far, but thought I would share them.  You can probably guess who is now the owner of the first shirt. (If you need a reminder you can go back a few years to my 4th blog post here to meet the manatee lover.)
 
I've tried unsuccessfully for a long time to find a cross stitch pattern to make a manatee sweatshirt for the manatee lover's autumn birthday but with no success. So when I decided to make her a t-shirt I looked through my pictures to see if I had anything appropriate. None were perfect, but one was chosen because it had at least one complete manatee in it:


After copying my photo to a Word document I added text and a graphic to the page: 


Using iron-on transfer paper (which I bought as a BOGOF per package sale offer) I printed off the transfer. If you do this, remember to use the mirror-image setting so that the text is properly formatted after ironing.
 
Tigger is now wearing this t-shirt:


T-shirt #2

Thanks to current tv options Fen has discovered old cartoons that most of us forgot (and for good reason, I might add). One of the characters has become his hero. Thanks also to old pictures found on the Internet I downloaded a picture of his favorite character:


T-shirts #3-#7

Uh, not even started although Sweet Pea did tell me that she would like one with her favorite animal, a hippo, . . . or a dog . . . specifically, Pepper.

Ok, perhaps you'd like to see pictures of our two latest cuties wearing the Valentine shirts that their Gram bought them instead. (I use the word "bought" loosely. I used bonus points earned from holiday spending to get each shirt for about $1.50 each. Hope that doesn't make me look like Gram-the-Scrooge).

Fen was giving his sister a little Valentine love.  :)


The picture is a little fuzzy but these moving targets were hard to photograph

And here is our newest little love and his Gram, who was privileged to visit him  on Valentine's Day in his home almost 2,000 miles away from her own (which is in an area warmer than her own year round):


I'll post more on shirts 3-7 when I have them.

Friday, January 25, 2013

Decorating the Kitchen Around a Keepsake

(I'm home-bound and phone-watching today so I decided to deviate from the usual post to tell about one of my past diy projects. I needed something to help pass the time)

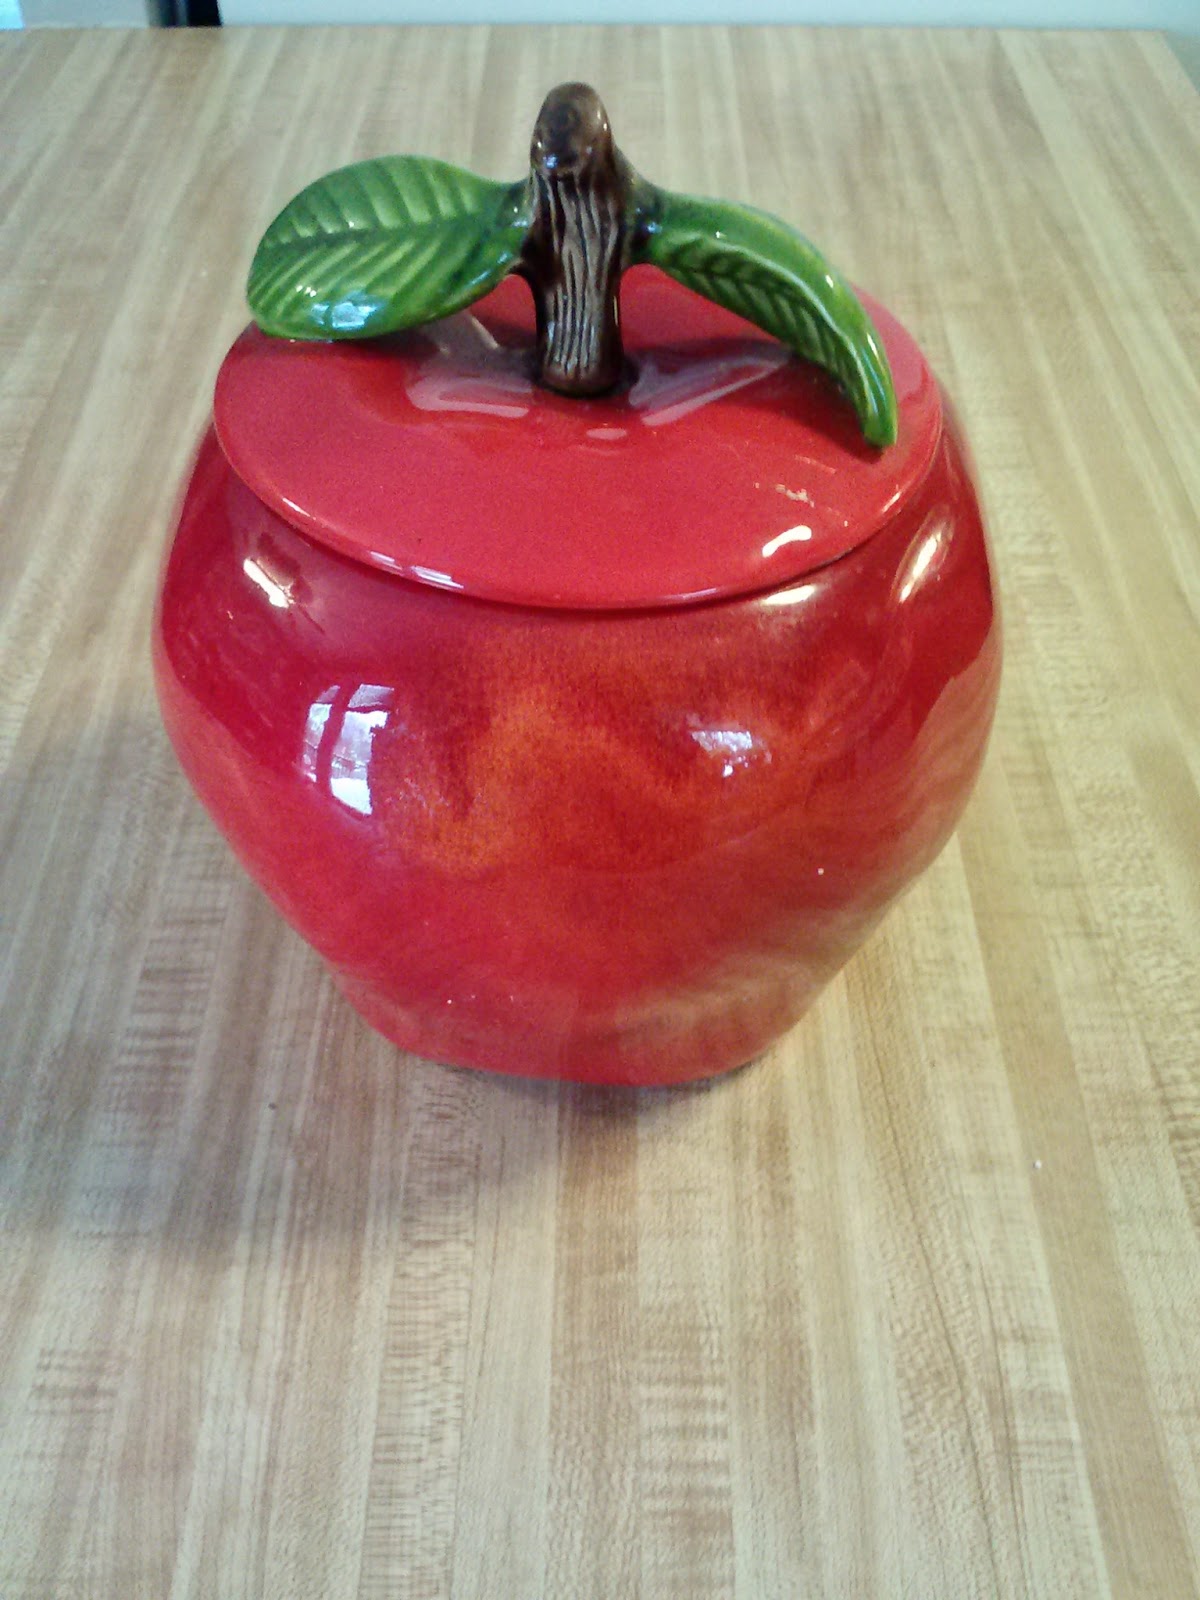
When we lived in Tennessee our kitchen colors were blue and white but when we moved to this house in Ohio the kitchen was decorated in green and I had to quickly adapt since we moved when October turns to November and the weather can be a mixed bag around here. Turns out that I adapted so well that I ended up making it my own by adding touches inspired by a certain keepsake.

This cookie jar is now 35 years old

When I was a young bride-to-be my grandma gave me this apple cookie jar as a shower gift. I could never bring myself to part with it if for no other reason than it was given to me by the only grandparent that lived long enough to see me walk down the aisle.

Canisters and place settings were the first items to be added in  the apple theme

The real adaptation was on the wall behind the sink. It lacked a backsplash and was covered with marred and dirty checkered green wallpaper. After looking it over and determining that it would take more time and money to get the paper off than we had to spend on a Kitchen Makeover (which is on our list of home remodeling projects under the heading of Someday When Money Is Not An Object) it was determined that an inexpensive, quick fix was needed. We decided faux tile was the answer. I painted this behind my kitchen sink and under the existing light fixture (which will be changed in that "someday" makeover):


Supplies:

  • Porter Paint in a semi-gloss finish to match the color we painted the rest of the kitchen (which happened to be a tan color)
  • 4 colors of Apple Barrel paint (red, green, white, and a slate color to imitate grout)
  • rags, sponges, and mini paintbrush
  • painter's masking tape
  • a ruler
  • self-adhesive decals
  • Plaid Clear Acrylic Sealer Gloss (aerosol spray)
It took several days to do this project, mainly because tiles next to each other could not be masked at the same time. One tile had to dry thoroughly before it could be masked over to allow its neighbor to be painted.

First we painted the wall with the Porter Paint and let it dry for several days. It looked so much better already! Next I drew the grid lines with a straight-edged ruler remembering to add space for the "grout."

 The "tiles" are standard 4.25 inch squares bordered by standard-sized edge piece "tiles" (not shown). I masked the first tiles I could paint being careful that they were not tiles next to each other. I used rags and sponges to get the effect I wanted. If I made a mistake I painted over it with the Porter Paint and left that tile unmasked until every other tile was painted (I only messed up one tile). This took several days.

When all of the "tiles" were painted and had thoroughly dried I again masked each tile in order to paint the "grout" between them. Once everything, tiles and grout, was dry I sprayed several coats of sealer over them, allowing plenty of time between coats. This took a couple of days.

The faux tile backsplash works as well as a real one. Splashes and drips wipe up quickly and it still looks nice after several years.

SOMEDAY will eventually come and then we can decide on something more permanent to fill the wall behind the sink, but for now the temporary faux tile continues to function as hoped and coordinates well with the keepsake cookie jar, which will never be changed.

Wednesday, May 9, 2012

Wednesday's Wisdom: A Few Random Thoughts

Getting behind in my posting recently has served as a reminder that neglecting the blog schedule is one thing but neglecting the Bible reading schedule is quite another. My first word of wisdom is that as you reach a busy time in your life, which these days pretty much covers anyone who lives in the northern hemisphere, make your Bible reading and prayer time your top priority. Nothing is more important than spending time with the Lord. Relationships become weak and sickly whenever they are neglected and the same holds true for the spiritual relationship.

Speaking of relationships, it will not be long until we celebrate the day I officially became a mother. I say officially because I cradled my daughter in my womb many months before I cradled her in my arms. Anyway, in honor of the "second anniversary of her 29th birthday" my oldest daughter, Karen, is having a give-away on her blog. The wise person will register to win this fabulous prize. Does that mean I'm going to enter? Of course!

And speaking of birthdays, it was pointed out by my friend, Vicky, that I did not post a link to the recipe I used last week when making strawberry pies for The Bear's birthday. That was probably because I had the recipe written on a piece of paper and not bookmarked on the computer. But that has been corrected now and I am more than happy to share the recipe and give the person that submitted it the credit due them.  You can find the recipe here.

There were a few suggestions under "reviews" that I intend to try (see #5 below the recipe at the link) but the recipe I used was almost exactly like the original at the link. I may cut the sugar back a bit as one reviewer suggested.


And as a final tip, let me suggest that it is wise to shop frugally for the ingredients. I bought store brand pie crusts for the sake of time but homemade crusts would have greatly reduced the price. The same could be said for whipped cream made from heavy cream and piped onto the pies with a tube decorator (I'm a bit snobbish when it comes to whipped cream because I prefer the real thing over the topping in tubs) but a can of the real stuff had to suffice. There was just barely enough in the can to go around the two pies.  The cost of the pies (minus crusts and cream) breaks down as follows:
  • 3 quart cartons of strawberries (used 2 1/2 for the pies) = $2.50. Aldi had them for $0.99 per carton;
  • 1 package of strawberry gelatin = $0.34 from Aldi
  • 3/4 cup of sugar = who knows but not much; I estimate less than $0.25 based upon 11 1/4 cups per 5 lb bag
  • candles = recycled from previous birthday parties; rare is the person in this family who gets new candles (and when they do it gets deducted from the cost of their gift. Just kidding).

And if you've read this far perhaps you'd like to see what happened to the leftover strawberries and a few melted chocolate chips:


They don't look as pretty as they would have if moved to a another platter but The Birthday Boy requested them at the last minute.

Monday, November 14, 2011

Day 36 Words of Wisdom

So teach us to number our days, that we may apply our hearts unto wisdom. Psalm 90:12

A little bit of practical advice for the traditional Monday laundry day:
Take the time to learn how to treat different types of stains on clothing.

If you do, your clothing will last a whole lot longer. This one doubles as one of those frugal tips I've been known to throw out there every so often.

There are many more that can be researched on the Internet but here are just a few that I've learned by experience through the years {sigh}:
  • Blood stains can be helped along by dousing them with hydrogen peroxide prior to washing.  
  • Tomato-based stains can be removed by wetting the stain and then laying the clothing in the sun.  They will be bleached out of the fabric.
  • Berry stains can be removed by pouring boiling water on them.  (This goes against everything you've ever been taught about not setting a stain!)
  • Some magic marker stains may be removed or faded significantly with rubbing alcohol.  (Crayola used to have a wonderful help line prior to their invention of washable markers.  Perhaps they still do.  I don't know. My kids stopped playing with markers several years ago unless Lulu still does in which case she is responsible for doing her own laundry.)    :)
As you probably know, but I'll say it anyway, always test an inconspicuous part of the fabric for color-fastness before proceeding.  My theory has always been that the clothing is ruined anyway so what have I got to lose by giving it a try?

Monday, June 13, 2011

Suede Parka Recycling

In my part of the world it is time to put away the coats and parkas in favor of short sleeves and swim suits. Unfortunately, my winter coat gave out on me before the winter season had ended - actually, the parka in question gave out before the winter season even began - but I couldn't bring myself to throw the suede garment away. I decided to recycle it.

The first several pieces were used by my Ohio History students to make reproduction maps. I wish I'd taken pictures of their efforts, but alas I did not so my poor representation will need to suffice.

We were studying French fur traders and the Native Americans at the time, so their maps showed waterways and trading posts and/or villages. That's Lake Erie shown at the top and a portion of the Ohio River at the bottom right. There are no land divisions shown other than the towns because this map represented the time prior to statehood. Since the students weren't little guys I allowed them to use permanent markers to draw physical features.

The students' maps used glued shell and wooden beads to mark settlements instead of the colored markers shown here. Then they each used a portion of the faux fur from my parka's hood, combined with bits of the coat's original belt, to tie their maps up into a roll. At the end of the year several of them mentioned that this was one of their favorite projects.

Map of Ohio Territory

I still had plenty of scrap suede even after the map activity so I set my hand to making a bolo jacket for the girls' Barbies from some of the smaller pieces.  Here is the doll that I borrowed (and which they never realized was absent from their stash).  She has since been returned, but I haven't given them the jacket yet.  It isn't gift quality, but I haven't found the right moment.

Barbie modeling her suede bolo jacket


And now it is summer and I'm still finding pieces of suede in my scrap stash. I decided to use part of it to decorate the strap of an inexpensive pair of flip-flops. 

I bought all of the craft items at Hobby Lobby today.  Being the frugal gal that I am, I am pleased to say that many of the notions were on sale.  There's a 40% off coupon at http://www.hobbylobby.com/ this week for the Vintaj charms shown.  The flip flops were also on sale.  The leather cord and beads were full price, but there is so much of each left over that I intend to make some jewelry, too.


Here's the finished product.  Well, okay.  Technically it's only half of the finished product since I have two feet, but once I got the first shoe finished I had to quit and get caught up on some housework.  Specifically, I needed to do our laundry.

I did mention that we had VBS last week, right?  Well, I had the foolish mistaken notion that I could keep up with my chores last week in spite of the additional time constraints. It wasn't to be.  (Just goes to show I must be an optimist in disguise!)  If I didn't stop and do some laundry today the residents of this house would be running around  - uh - unclothed.

Well, I supposes there might still be enough of the suede left to make primitive loin cloths for the guys and scant coverings for me.  Now there's a craft the pre-adolescents in my Ohio History class would really have rated highly! 

Tuesday, April 19, 2011

Pork Chops and Stuffing Recipe (Frugal Sunday 4/10/11)

Okay, it wasn't fair to put a picture of the main course here and then not put the recipe or the cost analysis. I'm about to correct that.

The original recipe was one that I discovered on an old computer recipe program that I had back in the '90s. Back in those days I didn't modify the recipe because my family liked it "as is." And then one day I came to the conclusion that I really didn't like it so I started experimenting. Here's my recipe for pork chops and stuffing. A doubled portion of chops is shown in the picture because I intended to feed 10 people.

You'll need the following:

4 or 5 porkchops
1 box of cornbread stuffing mix
1 can of creamed corn
brown sugar
Dijon mustard
water
chopped celery, and more chopped onion and/or spices to taste (optional)

Stuffing: Open the box and take out the packets of stuffing and herbs (they might be separate packages depending on brand). Mix these with the creamed corn and any additionals you wish to add. Spread these dry ingredients on the bottom of a 9 x 13 inch pan. The stuffing box tells how much water to use. Measure the water and pour it over the stuffing mix in the pan.

Pork chops: Lay pork chops over the stuffing. Mix enough brown sugar with the Dijon mustard to make a glaze. The amount will depend upon the number of chops in the pan. I use a ratio of 3:1 of brown sugar to mustard for each pork chop. Usually this equates to 1 tablespoon of brown sugar to 1 teaspoon of mustard for each piece of meat. Slather the glaze generously over the chops.

Bake uncovered in an oven that has been preheated to 375 degrees. Check the meat after 45 minutes for doneness. There should be no pink. If they aren't completely cooked put them back in the oven and check every 5 minutes until they are done.


This is a tasty recipe. The pork juices soak into the stuffing and add just a bit of flavor and a touch of a crust to the cornbread. (In my opinion the original unmodified recipe resulted in a stuffing that was too dry and crunchy.) The glaze on the chops helps to seal in the moisture of the meat and yet add a tart-sweet flavor.

The bottom line for cost? Believe it or not, I know almost to the penny.

The meat is the expensive component (as always!) and I paid $13.78 for the ten big chops that were on sale last week. I used 2 boxes of Stove Top Stuffing that I bought on sale and combined with coupons several months ago. This made the name brand cheaper than the store brand (which is $1.59) because they cost me $1.29 each for a total of $2.58. The canned corn was $0.50 a few weeks ago. The cost of the brown sugar and mustard were negligible in such small portions. So $13.78 + 2.58 + 0.50 = $16.86. Divide this by 10 and the cost of the main entry was less than $1.70 per portion.

We had a couple of vegetable dishes and home made (scratch) rolls as sides. I made yellow cake with fudge icing for dessert. The meal came in well under my target of $2.50 per person and those who got to eat it here (Pastor Dad, The Bear and his buddies, and myself) plus our own Meals on Wheels delivery service (Princess and her family) seemed to enjoy it. The Bear was especially impressed by the fact that I'd made homemade rolls.

Friday, April 15, 2011

An End to the Freezer Cleanout

We had not reached the bottom of the freezer when I decided to call a halt! to the proceedings. Oh, we're still eating out of our freezer, but the method that was being used to achieve the goal was not working fast enough. No matter how many meals I fixed it seemed as though we were making very little headway.

It's a very good problem to have. Can you imagine being so blessed with abundant stores of food that even after you've eaten two weeks worth of meals from the freezer's innards you're still pulling more and more and more out of it? There's a Bible lesson in there and our cup was obviously running over!

To get to the end of my cleaning task I utilized our cooler and the upstairs freezer to store all of the frozen meat and bread until the time that I had the chest freezer defrosted and sanitized. This worked well.

Then I took inventory. What I found amazed me! I still had enough meat to make 30 meals for Pastor Dad, The Bear, and me. If I hadn't sped things up a bit the Great Freezer Cleanout would not have been completed for another whole month!
It sure doesn't look like there's any food in this freezer!

Okay, maybe just a little bit of food is in there!

Why, yes!  There really is food in there.  And the contents really is enough to feed this family of three adults for a whole month!


I learned a lot from this. First, as mentioned, we are abundantly blessed!

Second, I can see that meat is really not one of the things that I need to be concerned about buying except when it comes to having enough of something to feed the gang on Sunday. Maybe I should think about replenishing the dismal supply of frozen fruits and vegetables instead.   :)  Just a thought.

Third, it is time to get busy cleaning my pantry shelves. Then I'll have an ideas of the recipes that can be made from combining the pantry items with those in the freezer.

Fourth, my grocery receipts from the last 3 weeks total $98.46! That's the combined total for three weeks not the total for any one week. These expenditures included basics like paper supplies, staples, supplemental items for three different Sunday meals, and some junk food for The Bear (who kept asking, "Really, Mom, when are you going to the store again?!!!!")

Overall, I'm pretty happy with all of this. Cleaning the freezers helped put our home economy into proper perspective. ^o-o^

Now, on to tackle the pantry shelves!

Saturday, April 9, 2011

Let Them Eat Quiche


I had all of those lovely bread crumbs from the dried out hamburger buns that I'd run through the food processor the week before and I didn't know what to do with them.   I didn't want to coat any more meats or fish before frying them and I certainly didn't want to throw the crumbs away. Wasting food is definitely not frugal!

I had the idea of using them to make a pie crust but I wasn't sure that this was possible.  I found this site here which told me that it most assuredly is.  Armed with this knowledge, I pressed on!  (Pun intended.)

I had 3 cups of crumbs that I combined with 3 tablespoons of melted butter in the bottom and sides of a 9 inch pie plate.  I then froze the resulting shell.

Later, I took a basic quiche recipe of 4 beaten eggs combined with 3/4 cups of half and half and modified it.  I didn't have half and half but I did have a carton of heavy whipping cream (thanks Karen and Philip) that I used instead.  I did this by combining 1/2 cup of skim milk with 1/4 of the cream.

I had never made a quiche before.  We only have real men around here so I'd never attempted one.  (What?  You don't remember that book?  Real Men Don't Eat Quiche, I think it was called.)  Anyway, real men or not, mine were in for a somewhat kitschy quichey meal.

The big decision was what to put in the quiche.  We were out of all cheese except for a slice of American and none of the usual quiche filling ingredients were available either so I improvised again.  It turns out that we had a couple of banana peppers in the freezer and a jar of chunky salsa in the refrigerator.  Hmm. That salsa would definitely add some veggies to this meal!   I took about 1/2 cup of the salsa and slices of one pepper and added them to the egg batter.

I then poured the batter into the frozen shell and set my concoction into a preheated 350 degree oven.  It took about 45 minutes to bake and that was with me checking often after the first half hour to see if it was done.  I did this by inserting a bamboo skewer into it often (we're out of toothpicks, too).  When the skewer was clean, the dish was done.

The final touch was to tear up that piece of cheese and place it on top of the warm quiche.  It promptly melted and I spread it as best I could with a knife.

The Bear looked at my concoction with a skeptical eye.  Evidently he has also heard that real men don't eat quiche even though he wasn't even alive when that book first came out.  He asked me what this dish is called.

Not to be outdone I told him that it is called "Scrambled Eggs With Salsa On Buttered Toast."  (Hey!  I can call it anything I want!)  He loves scrambled eggs.  He loves buttered toast.  He ate it and he liked it!  Adding a serving of bratwurst sausage complemented the um, scrambled eggs, and used up another meat found at the bottom of my freezer.

Frugal Sunday Menu 4/3/2011

We returned home from the funeral in Tennessee last Saturday evening and had to prepare many things for the next day, including Sunday dinner.  As part of my Great Freezer Cleanout of 2011 I checked to see what was available to fix our crowd. 

I was very blessed.  One of the things in the freezer was a 3 lb. bag of skinless, boneless chicken breasts that I'd bought on sale a few weeks earlier.  A check of the pantry showed canned chicken bouillon.  Using these ingredients I was able to make a stock-pot full of chicken and dumplings.  The dumplings were made from scratch which helped to keep the cost down significantly and to improve the taste (in my opinion).

Bags of store-bought vegetables (corn and broccoli) were added, as were frozen rolls.  The big splurge of the day was a frozen store-bought turtle pie (also bought on sale) because I had no time to make a dessert. 

I have a pretty good idea of what I spent on the chicken  a few weeks ago ($5.99) and each of the veggie bags ($2.00 each).  The pie cost about $3.00.  So for about $13 I fed 11 people on Sunday and had enough chicken and dumplings left over to make lunches for 2 days.  Also, 7 of Sunday's 11 people were adults. 

Price per person on Sunday was less than $1.20 each.  Factoring in the leftover lunch portions would make the cost considerably less (below $0.90 per portion).

And the best part was that everyone liked the meal and was pleasantly surprised that we weren't forced to go out to eat due to our unexpected funeral trip.

Monday, April 4, 2011

The Great Freezer Cleanout Continues

Guilty! I confess that I took the picture of the geese at the neighborhood Frisch's Big Boy during the week when we were cleanning out the freezers, pantries, and cupboards.

But not guilty for eating dinner there. We just dropped by for coffee and dessert. (I had the coconut cream pie. Yummy!)

As for food, well, we're still cleaning out the freezer. As my blogging buddy, Karin, pointed out occasionally the thing needs to be emptied and restocked. Something that was originally bought as a bargain might end up being totally wasted otherwise. Not. Good.

And as Karin also pointed out, the occasional mishap will happen. The last time our freezer was emptied was when we were hit by Hurricane Ike back in 2008. Grills all over the area were fired up to cook the contents of electricity-starved freezers: The Great American Barbecue as hosted by Hurricane Ike!

I was a bit remiss in my efforts to keep you posted, but I had good reason for it. There was a convention in town and a funeral out of town that we attended. I'm working my brain to remember what I cooked last week. Oh, wait! It's coming back to me.

  • Wednesdays are always busy days.  I boiled eggs for our lunch and The Bear and I had ours as egg salad sandwiches.  Pastor Dad just ate his with a pinch of salt.  Some of us ate fruit.
  • For supper that evening I used my food processor to grind a package of dried out hamburger buns into crumbs.  I then coated flounder fillets from the freezer with some of the crumbs that were mixed with Italian seasoning spices. Olive oil was drizzled in the pan and over the tops of the fillets before baking to make a crispier crust.
  • Thursday's lunch consisted of hotdogs from the freezer and some buns that were NOT dried out or freezer burnt.
  • Dinner that night consisted of a whole chicken (previously cut into halves before freezing) being roasted in the oven.  Canned vegetables were served as a side dish.
  • There was enough of the chicken left to make sandwiches for Friday's lunch. 
After lunch our family went downtown to the homeschool convention.  We didn't get to go as early as we would have liked or stay as late as we intended because we were either home packing for our travels or traveling itself.  Pastor Dad had a funeral to preach in Tennessee.  We left after Tim Hawkins' show (and were mighty thankful that we had tickets for the early one!) to drive south, reaching our destination around midnight our time.  We returned home the next day and made preparations for Sunday dinner, which DID happen as scheduled (much to everyone's surprise, including mine!).  I'll tell about that meal in a separate post.

In conclusion to last week's great freezer cleanout let me state that due to unforeseen circumstances (a funeral) and the fact that we barely made a dent in the contents of the downstairs freezer, I will continue the Great Freezer Cleanout this week also in a somewhat modified manner. (Meaning that there are a few things that I absolutely must, muST, MUST buy at the store this week!)

Friday, April 1, 2011

A Few Frugal Tips For Couponing & Grocery Shopping

I don't usually buy a Sunday paper. And I don't always shop with coupons. We won't go into all of the reasons why (I'm too lazy?) but we will look at a few ways that I coupon when I coupon.  And I'll throw in another hint at the end just for the fun of it. :)

It's true that we don't subscribe to the paper. We have in the past but found that it usually was recycled or composted unread. That's not a good value. However, if I happen to want a Sunday paper, I stop and buy one on the way home from church.

"Well, it looks like you're not much of an expert when it comes to couponing then," you say? Maybe not. Or maybe I've learned to maximize my time and effort. Here are a few tricks I use while living a frugal,lazy life.

  1. Only buy the newspaper when there are coupon inserts. Here's one site that lists what and when.  No need to stop for a paper when no coupons are scheduled!
  2. Start your own coupon swap between girlfriends, family, or church members. All it takes is one gullible, er, willing individual to keep the donations and to organize them into a usable fashion. In our family, it is my mom who passes her dissected coupon inserts down to me and my married daughters. We, in turn, share our own with each other before cutting everything out and passing on any we don't want to the willing coupon coordinator at our church who sorts and files them in a huge binder. We have access to that binder after church. (I stress "after" because there better not be anyone going through the book during the worship services!)
  3. Besides printing additional coupons from Smartsource and Red Plum directly from a home computer you may wish to purchase popular coupons for a nominal fee from a clipping service. This site offers a review of some of them. More may be found via Internet searches. (When I did a search of my city I found that there is a service in my neighborhood! Who knew?!) If you find one in your area you might be able to pick up your selections saving the postage and cutting the wait time.
  4. Once you've got your coupons there is the problem of organizing them. This is where my program always broke down. I hate searching through my folder or envelopes while in the store so I devised a workable solution for me. File the coupons by store rows. Then it doesn't matter that my store hides the toilet paper& in the same row as the cereal. Those coupons are in the same pocket. And I'm only dealing with one pocket at a time, moving my finger from pocket-to-pocket as I progress through the store. (If I go to a different store I need to remember that the toilet paper coupons are in with the cereal ones, but that's never been a problem for me.)
*I've got one more tip for helping to stay on track in the grocery store. Put the allotted grocery budget on a store gift card. I used to shop with cash (a la the Dave Ramsey method) but was astounded at the things that we might designate as "groceries" in a financial pinch. I might get to the store and find that the envelope money bought dog food at the pet store. (Hey! I thought we were trying to keep us from eating Alpo!) Putting the money onto a reloadable store gift card put a stop to that. And I'm especially careful with my purchases knowing there is a finite amount on that card. (Can you say, "No, son, there isn't enough on the card to purchase that big bag of beef jerky"? I can now.)

As an added bonus, since I shop at Kroger and our church participates in their Neighborhood Reward Program my reloads mean the company will make a 4% donation toward church summer camp for children who can't afford to pay their way. Check with your retailer to see if they have a similar program and then ask your church or charitable organization to participate.

Okay, I don't just shop at Kroger. But I do buy about 75% of my groceries there.  I reload my card 3 weeks out of each month and use the money for the 4th week to shop elsewhere. Someone else might need to put 75% and save 25% as cash each week for other expenditures, like dog food from the pet store or sales at other markets. Whatever works best for you. This is just how I budget to make sure only one "member of the family" is required to eat dog food. :)

Tuesday, March 29, 2011

This Week's Chore: Spring Cleaning the Pantry and Freezer

There was no time to do the grocery shopping this weekend unless you count the staples bought using the few dollars left from the previous week's grocery budget. That got me thinking. I wonder if I have enough food on hand to feed us this week? I wouldn't mind saving the money. And as an added bonus I could clean the freezers and shelves.

Sounded like a plan. And yes, I know it isn't original with me. But right now I'm in the mood for spring cleaning and this opportunity just naturally presented itself.

So far I have managed to clean out the upstairs cabinets and the small freezer (the one attached to the refrigerator). The chest freezer and the downstairs pantry shelves still remain (and are the ones that make me groan just thinking about them). Here are the meals that have resulted from my current efforts:

  • A single can of tuna made a nice lunch yesterday after we returned from co-op. Since we had no sliced bread thawed (at that time, anyway) we ate tuna salad on a tube of Ritz crackers.
  • Last night The Bear fixed a "found" box of macaroni and cheese as a side dish for leftover spare ribs and mixed vegetables.
  • This morning I used the last of a box of baking mix to whip up waffles which were topped with the dregs of an almost empty syrup bottle. The last few slices of bacon were microwaved also. (Since we sleep in on Tuesdays this was brunch.)
  • This afternoon we had an improvised version of "Hawaiian pork chops" using a can of pineapple chunks, some brown sugar, and a bit of flour for thickening the sauce. A package of brussel sprouts that was unearthed from the back of the freezer provided veggies. (Pastor Dad has an evening appointment so we ate an early meal.)
  • The breakfast bacon drippings were combined with remnants of corn meal and rye flour and added to the meat fats saved for making bird suet. See my recipe here. We are out of peanut butter but the woodpeckers don't seem to mind. The basket has been empty for a couple of weeks but it took mere minutes for them to discover that I'd refilled it. They must have quite the advertising system!
So far, so good! No one - not The Bear or the birds - are in any danger of starvation.

Monday, March 28, 2011

Frugal Sunday Dinner, 3/20/2011

The date is not a mistake. Not only did we not eat here yesterday, but I did not have opportunity last Monday to discuss the previous day's meal. We were busy with special services at church all week so my attention was focused elsewhere.

Special services also means special guests around the Sunday dinner table. As a consequence, I spent a bit more money than usual for the meal, at least I thought that at first. But upon further inspection I discovered that I actually got more mileage out of this meal than anticipated.

Our menu was a classic dinner of roast beef with gravy, baked potatoes and fixings, baked sweet potatoes, California-style veggies, and rolls. We had hot fudge cake for dessert.

The biggest problem I encountered, besides the fact that I wanted this meal to turn out well, was that I had to buy just about everything for it because there were no roasts in my freezer or potatoes in the bin. I also had no cake mix, sour cream, or time to make rolls or hot fudge sauce from scratch. In other words, I had to buy practically every ingredient. Thankfully, that doesn't happen very often. But since it did, I know that I paid exactly $44.93 for the meal. And since I know I fed 13 people that Sunday I also know the price per person to be about $3.46. OUCH!

But that's not the whole story. We had leftovers, and lots of 'em!

On Monday, I took some of the leftover roast, gravy, California veggies, and one baked potato and combined them to make beef stew. Since we had homeschool co-op all day and little time to prepare dinner before the evening church service I was able to feed the three of us a meal made from the leftovers without it seeming like we were eating leftovers.

On Tuesday, I used two of the leftover baked potatoes and combined them with milk, sour cream, and cheese to make loaded potato soup. There were enough slices of roast left (sans the gravy) for sandwiches. This was another quick meal designed for a church night.

Since there were 13 fed on Sunday and 3 each on Monday and Tuesday, the total number of people fed from that $44.93 was actually 19. This brings the cost down to $2.36 per person which is within my target parameters for a nice Sunday dinner.

As always, I'll leave you with the directions for the dessert that was served. If you have a Shoney's, Frisch's, or other restaurant that serves a hot fudge cake, then you'll know what this looks like.


HOMEMADE HOT FUDGE CAKE

Bake a chocolate cake in a 9 x 13 inch pan according to the directions on the box. Allow cake to cool but DO NOT ICE IT! When ready to assemble, cut cake into squares. Slice each cake square horizontally to make a top and bottom layer.

Place a slice of vanilla ice cream between the cake layers sandwich-style. Heat homemade or commercially prepared hot fudge sauce and place a generous portion on top of each cake/ice cream sandwich.

Put a dollop of whipped cream over the fudge sauce and finish with a cherry on the top. Serve immediately.

Makes 15 generous servings.

Friday, March 18, 2011

The Original Greater Cincinnati Restaurant Week

If you're in the Greater Cincinnati area this weekend and looking for a thrifty way to appreciate a finer dining experience I have the perfect suggestion for you:  The Original Greater Cincinnati Restaurant Week.  There are 34 restaurants from which to choose and $26.11 per person gets you a 3 course meal in one of them.  I've eaten at several of the participating restaurants through the years and think I can say that you will be impressed.

Pastor Dad received a $75 gift certificate to one  and we used it last night.  We both think that it was probably the best meal we've ever enjoyed outside of something I've cooked at home.  (Bwaa! haaa! haa! ha!  Sorry!  Wait a minute while I wipe the tears from my eyes and compose myself again. Whoo boy!)   And the fact that we had a gift certificate merely added to our pleasure.  But even without a gift certificate, the meals would be a bargain. We intend to go back for our anniversary.  (Right, dear?)

Check the link for a list of participating restaurants and menus.  And hurry!  The last day is this Sunday, March 20th.

New to Me: Book Swapping

I'm a bit late to participate in Frugal Friday and the same could be said about my  participation in the whole concept of swapping books by mail but thought I'd throw this out there anyway just in case others haven't discovered this source of trading reading material.  I joined Paperback Swap last week and you know what I've been doing lately?  Mailing books!!!! 

Of the first 10 that I posted when I joined (and 2 DVDs that I posted at tbe sister site,  Swap A DVD) I've mailed 6 books and 1 movie.  That means I must've had some pretty good stuff since they were snatched up or put on hold within minutes of being added to the system. 

Several of my books (and the movie) have already reached their destinations so I have several credits to spend.

I'm like a kid in a candy shop.  :)

Monday, March 14, 2011

Frugal Sunday Dinner 3/13/2011

Our menu yesterday consisted of
  • Oven-fried Chicken Parmesan
  • Poultry Stuffing
  • Green Beans & Potatoes
  • corn
  • biscuits
  • Punch Bowl Cake
  • ice tea and lemonade
There were 9 of us at the table yesterday.  (Baby Lili was sleeping in my bedroom.)  We had a guest preacher staying in our home also.

I wish I had taken pictures of the meal, at the very least one of the Punch Bowl Cake.  Or better yet, of Sweet Pea who sat guarding it the whole time dinner was in the oven.  Or perhaps of that moment at the table when she took a bite and started sputtering like an engine in need of a tune-up.  Until then, no one - and I mean no one - knew she didn't like coconut.  That Sweet Pea!  She sure has the potential of adding a touch of levity to any recipe!

The Punch Bowl Cake was not "Plan A" for my dessert.  I intended to serve a golden butter cake with chocolate fudge icing (the icing is my mother-in-law's recipe) but the layers fell apart coming out of their pans.  Of course!  What did I expect when there was a guest for dinner? Hence the need for "Plan B," the Punch Bowl Cake.  I think Sweet Pea wished there had been a "Plan C."   

Anyway, besides the corn that came out the freezer, the biscuits, and the drinks, I will share where I found the recipes.  You'll need to use your imagination to see it.

The Oven-Fried Chicken Parmesan recipe was from The Kraft Cookbook.  It was published in 1977 to celebrate 75 years of Kraft.  I've owned the book since we married in 1978.  I doubled this recipe and used only thighs and legs that I bought on sale a couple of weeks ago.  Every other ingredient is a staple around here, including the parmesan cheese.

The recipe for Poultry Stuffing is in the book Fix-It and Forget-It Recipes for Entertaining, a slow cooker recipe book.  This recipe was a good way of using some of the free bread that I've been blessed with in abundance in recent weeks.  I put a loaf through the food processor and we were in business!  At one point our visiting preacher joked that he thought I was making bread pudding, which means he must've thought the Punch Bowl Cake had fizzled and that I'd moved on to "Plan C" for dessert.  Very funny!  Hmm. On second thought, I wonder if Sweet Pea likes bread pudding?  Maybe we'll find out next week.

I used a recipe for Green Beans & Potatoes from Busy People's Slow Cooker Cookbook.  It was very good and used bacon bits for texture and flavor.  Canned beans are the basis for this recipe.

The Punch  Bowl Cake was also found in a cookbook, but one compiled for a fundraiser.  And since the person who submitted the recipe is my aunt, I don't think she will mind if I share it.  Come to think of it, I think she got this recipe from me in the first place because I was making this dessert several years before this cookbook was published.  Either way, no one will care that I share.


Punch Bowl Cake

1 pkg. butter recipe cake mix
2 6-serving packages of vanilla instant pudding (my store doesn't sell this size anymore so I used 3 4-serving sizes instead)
5 c. milk
3 bananas, sliced
2 (20 oz.) cans of cherry pie filling
2 (20 oz.) cans of crushed pineapple, drained
1 1/3 c. coconut (which shall be omitted in the future thanks to Sweet Pea!)
1 (16 oz.) container of frozen whipped topping
pecans, chopped (which I had already omitted because others in the family don't like nuts)

Bake the cake according to directions and allow to cool. Break into pieces (my cake did this for me, sigh)  and place in the bottom of punch bowl.  Beat pudding and milk.  Cover cake with half of pudding, half of bananas, 1 can of pie filling followed by 1 can of pineapple, half the coconut.  Repeat the layers.  Spread whipped topping over the top and garnish with nuts and more coconut if desired.  Refrigerate overnight.


The worst part about the punch bowl cake is that it takes up so much space in my already over-crowded refrigerator!  This is where the crock-pot recipes were helpful.  Many of their ingredients are shelf items and very little that had to be prepared ahead needed to be refrigerated.  And I did use both crockpots again yesterday.

It was a little bit harder to determine the cost per person for this meal.  We had left-overs of everything, including the chicken, so Pastor Dad, The Bear, and I will get another meal out of this.  Obviously this increases the number of people it will feed and diminishes the cost per serving.   My most expensive items were the chicken at about $7 (the total cost on the packages), and the canned goods for the dessert that I bought on an emergency run back to the store.    There's no way this meal cost more than $1.75 per person and I'd say that estimate is high even though the biscuits were canned (bought for less than $0.30 per can during one of the savings events of recent weeks).  

If I can keep my cost between $1.50 and $2.00 per portion each Sunday I am one happy hostess.

Thursday, March 10, 2011

Why Be Frugal?

All this talk about frugality has probably made some of my friends and family wonder what has happened to move this issue front and center.

Um, nothing.

Well, not quite true. Perhaps "not much" would be closer to the truth. There was this bill that came in the mail about 6 weeks ago. If you're scientific you might think of the moment as a catalyst. If you're religious you might think of it as an epiphany. Whatever you want to call it, it got our attention and put our finances into perspective.

Most of us have had those moments. We all make choices about how to spend our money.

Anyway, that certain moment helped us decide to lower some expenditures so that we could raise others. So today, instead of giving you examples of how to be frugal I will give you reasons why to be frugal. Your list might look different than ours but this is a list of how we would choose to spend our money.

Cutting expenditures in some areas will help us increase these:

  1. Giving to our church and other ministries. We recognize that everything we have belongs to the Lord and is only on loan. We would like to have more funds available to help lay up treasures in Heaven.
  2. Sunday after-church lunches for our extended family and anyone else that the Lord directs us to bring home. We don't have a L'Abri ministry like the Shaeffers did, but we do have an open-door policy most Sundays. (I told here about the luncheon that fed 14. The next Sunday 18 were fed a meal akin to a banquet, and I posted here about the modest meal 7 of us ate last Sunday.)
  3. Our debt snowball. We dug a financial hole years ago and have worked hard to get out of it. We were originally on track to be out of debt 4 years from now. Then other costs increased and we had to use the snowball money to make ends meet. Now we're wanting to get that sphere rolling once more. Physical Science students will realize that it takes more energy to get a stationary object moving than it does to keep one moving (think overcoming static friction versus kinetic friction). Our realistic goal now is to be totally debt-free (including our house) 5 years from now. It is do-able.
  4. My time as a stay-at-home homeschooling mom. Well, actually this isn't an increase. It's just that we'd like this to be able to maintain the status quo until the last one graduates, which isn't for a couple of more years.
  5. Financially assisting our grown children. Actually, this is not an increase either, but we do want to be able to continue to help when we can and if we can.
  6. Home remodeling projects. Which, by the way, is where much of our money has gone in the last several years. We live in a nice house (which means "modest" as opposed to a ni-i-ice one). Ours hasn't quite been as expensive to keep livable as the ni-i-ice house in the old Tom Hanks-Shelley Long movie, The Money Pit, but it's had its moments.
  7. Saving for the future. Yeah, some day we'll really be old. Right now we're just practicing. :)
I'm so much happier when I voluntarily give something up in order to gain something better. It isn't what we give up but what we get instead that helps keep us on track and helps to return us to the track if we've strayed.

This post is linked to Frugal Fridays at Life as Mom.